 The past few years have seen amazing changes in amateur astrophotography: the meteoric rise in popularity of relatively low-cost CMOS sensors; the unfortunate demise of the CCD sensor; and the huge range of innovative new telescopes and mounts. Sadly, the one remaining constant is the bad weather. It feels like clear nights are becoming rarer, meaning our beloved astro-gear languishes unused for weeks at a time. Now, though, our constantly evolving hobby has a relatively new option, which is to use remote telescopes that are located in dark locations free of light pollution and offer imaging with premium-grade telescopes. I’ve been using remote telescopes for quite a few years now, originally with the two-metre Faulkes telescopes in Hawaii and Australia, and more recently with a shared imaging rig in various locations in Spain. While attending European AstroFest in 2019, I was introduced to a new imaging platform called Telescope Live and I spent the rest of that year using their telescopes for remote imaging. The platform recently underwent an upgrade to Telescope Live 2, sporting a new-look website (https://telescope.live) with many new features and functionality. I’d like to share with you the many advantages of remote imaging and hope that I can convey the excitement of using such equipment to produce your own images. Even as a long-standing astro-imager myself, I’ve been astonished by the high quality of the data and instrumentation supplied by Telescope Live. It has opened up a new vista of the southern sky and the marvellous targets that are always below our horizon in the UK.
Let’s start off by perusing the telescopes that are available. There are three observatories, sited in Chile, Spain and Australia, all of which offer excellent viewing of deep southern targets, as well as great views of the northern sky from Spain. The telescopes at all the observatories are equipped with Astrodon LRGB and 3nm narrowband filters.

El Sauce Observatory, Chile (70.76300°W, 30.47253°S)
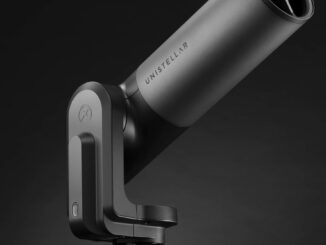
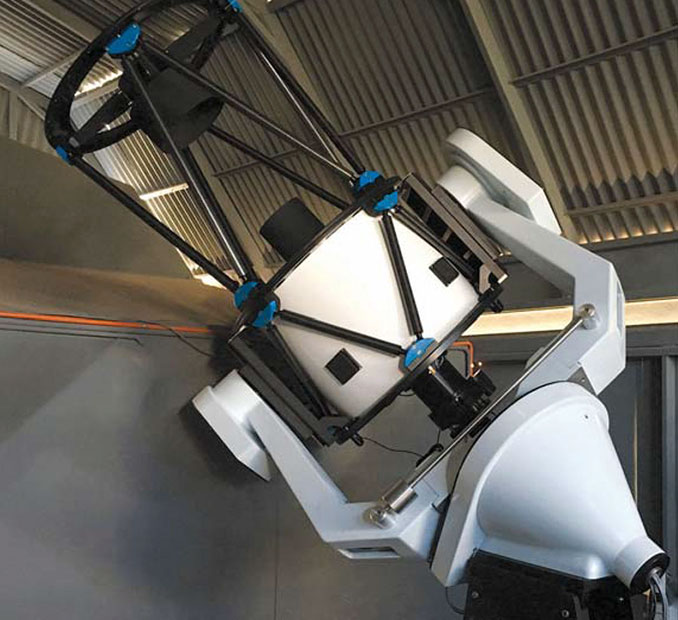
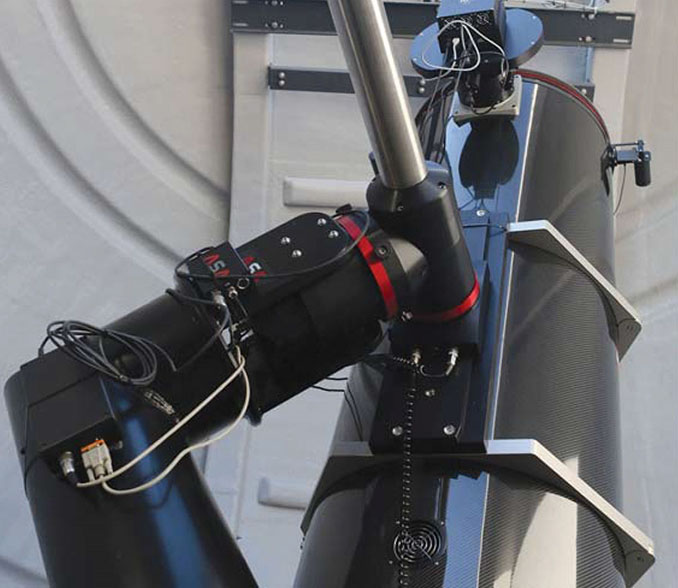
This observatory features five telescopes of various sizes. Pride of place goes to the ASA RC-1000AZ behemoth (CHI-3), a one-metre telescope on a Mathis MI-1000 computerised altazimuth mount (Figure 1). Next is what is probably the most popular telescope at this observatory, a 60mm Planewave Corrected Dall–Kirkham optical design (CHI-1, see Figure 2). For wider fields there are two superb 500mm corrected-Newtonian reflectors, CHI-2 and CHI-4, with fast f/3.8 pin-sharp optics and a focal length of 1,900mm, which is ideal for wide but detailed imaging (Figure 3). Finally, a recent addition to the site is CHI-5, a Nikon 200mm, f/2 lens and an FLI ML16200 CCD camera, optimised for ultra-wide-field imaging.
IC Astronomy Observatory, Spain (2.40857°E, 37.50103°N)
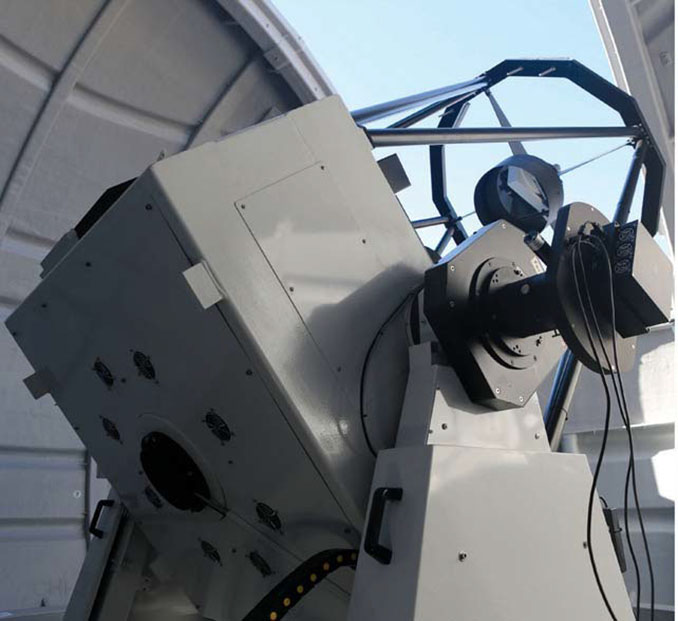
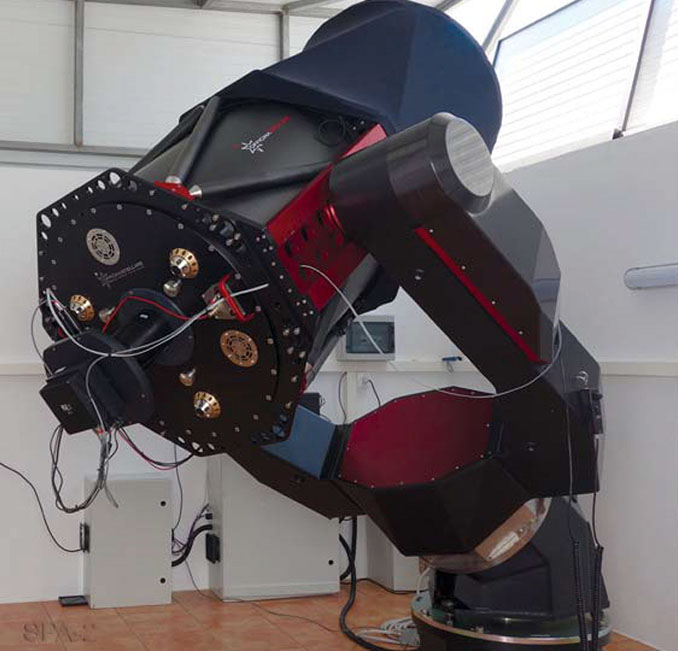
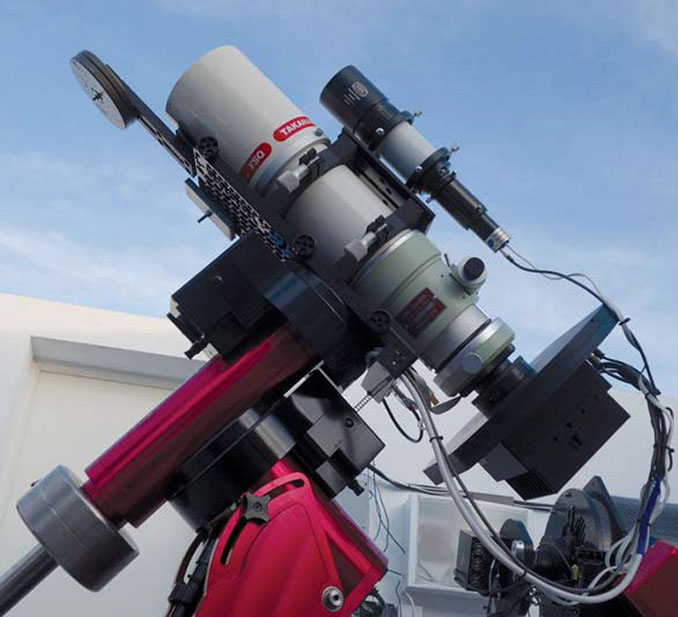
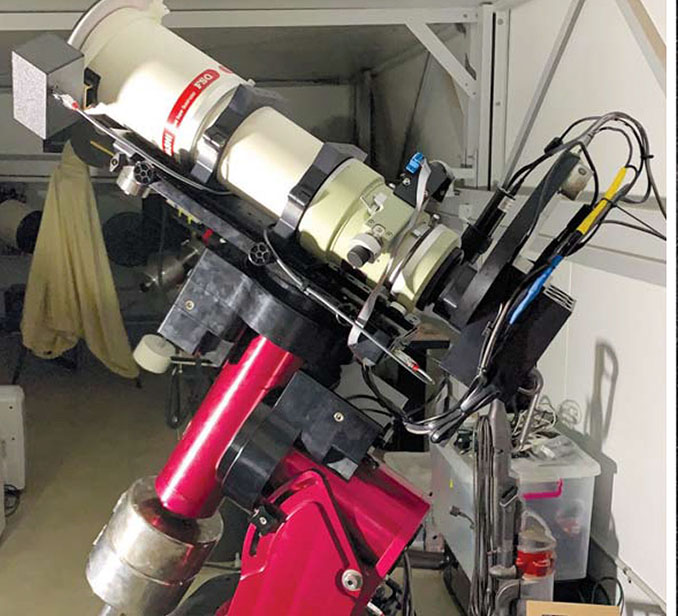
Telescope Live have three telescopes at their Spanish location, which is the site of IC Astronomy, owned by Colin Cooper and Ian King, and situated in one of the darkest parts of Spain. The largest telescope here is SPA-2, a 700mm Officina Stellare Pro Ritchey–Chrétien telescope combined with an FLI PL-16803 CCD camera (Figure 4). There are also two premium Takahashi FSQ-106 (100mm) refractors on Paramount MX+ mounts (Figure 5).
Heaven’s Mirror Observatory, Australia (148.97639°E, 34.86416°S)
For wide-field imaging of deep Southern Hemisphere targets is AUS-2, which is another Takahashi FSQ-106 (100mm) premium refractor on a Paramount MX+ mount (Figure 6).
Imaging plans
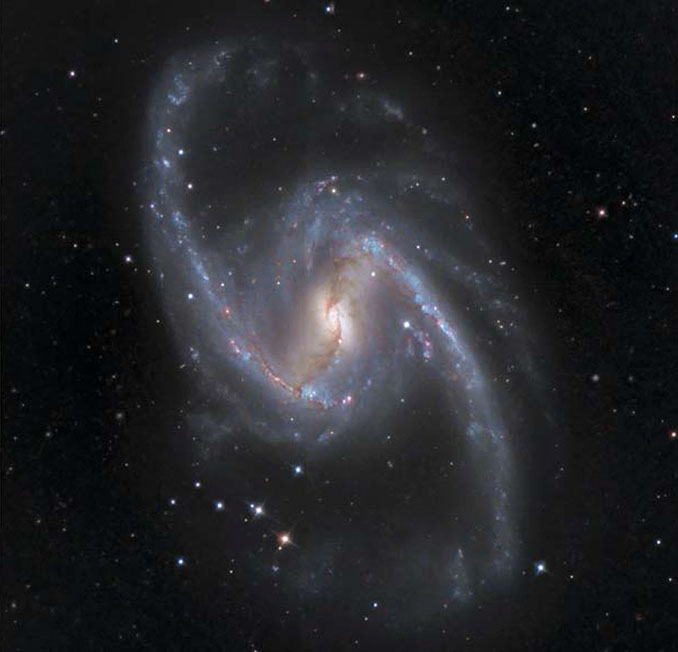
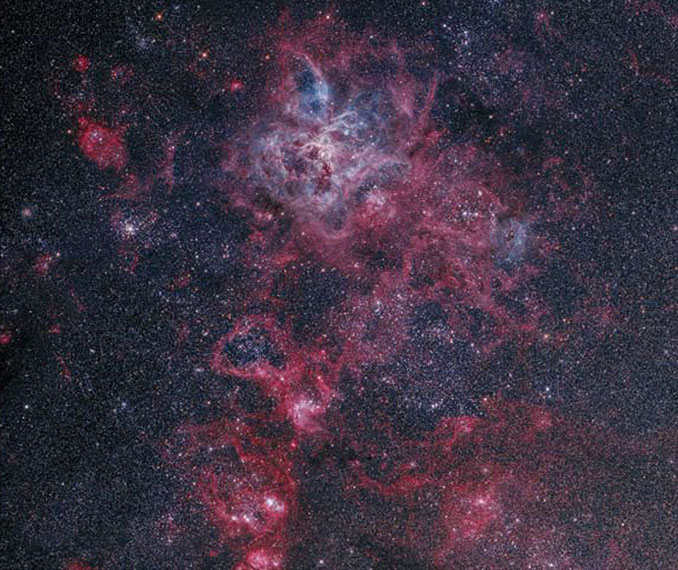
Hopefully the images on these pages show the quality of data that is attainable with this excellent range of telescopes. If you’d like to try your own hand at remote imaging, then the good news is that the Telescope Live 2 website is easy and intuitive to use, and you are entitled to a four-week-long trial period without any form of payment required.
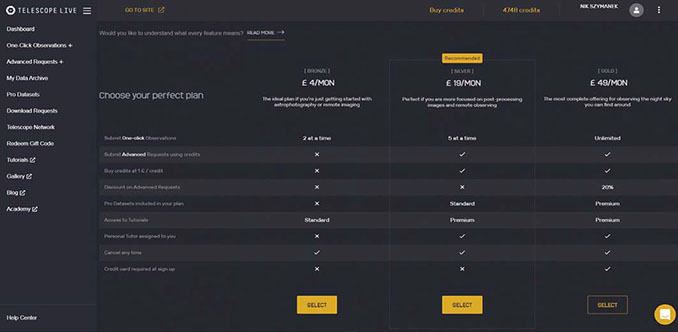
After launching the website and clicking on the ‘Get Started’ button, you’ll be prompted to set up a user account. Telescope Live offer three observing ‘plans’ – Bronze, Silver and Gold (Figure 7). The first two are available in the free trial period. Once that period has expired, you’ll have to sign up for one of the plans if you wish to continue using the telescopes. These have been carefully tailored to suit all levels of expertise, from complete beginner to advanced astro-imager. The Bronze plan costs £4 per month and allows you to submit two ‘one-click’ observations, which are targets that consist of bright objects that can be successfully imaged using short exposure times. Under the ‘One-Click Observations’ tab at the upper left of the screen, you can click on ‘New Observation’ to be taken to the available list of targets, which displays objects that are currently visible to the telescopes. Once you’ve made your choice, it’s a simple matter to click on ‘Observe Now’ and then sit back and wait for your image to be taken. The time this takes can be variable, but usually it is quite quick. A message will be sent when the observation has completed and the data are available. You can now schedule a further two one-click observations. It’s worth mentioning that although the data sets are quite small, a combination of high-quality instrumentation and pristine observing conditions means that extremely good images can be taken, sometimes with just one 10-minute exposure per filter. All observations are pre-calibrated with dark, flat-field and bias frames.
The Bronze plan is ideal for newcomers to astrophotography and also permits access to a selection of imaging tutorials compiled by Adam Block, Peter Jenkins, Alexander Curry and myself to cover all aspects of imaging with popular software such as PixInsight, Photoshop, Deep Sky Stacker, FITS Liberator, etc.
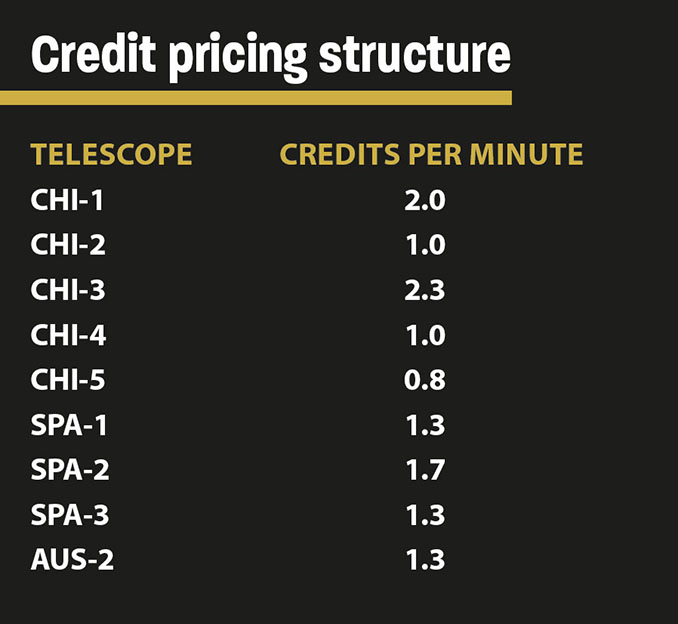
For experienced imagers the Silver Plan will be more suitable. It costs £19 per month and allows the submission of five one-click observations at a time but, crucially, enables you to schedule ‘Advanced’ observations. These are where you choose both your own target and which telescope you’d like to use, as well as your preferred filters and exposure times. To do this you have to purchase credits, which are priced at £1 per credit. Each of the telescopes has its own credit pricing structure, which I’ve itemised in the accompanying table.
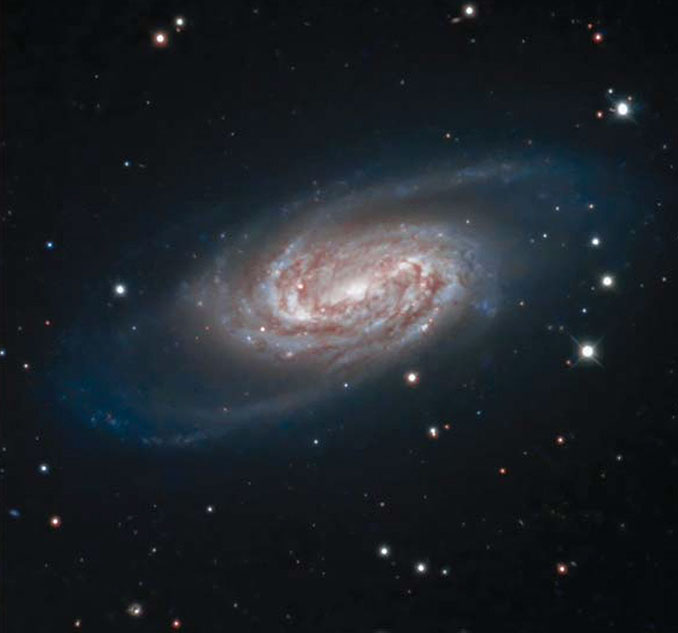
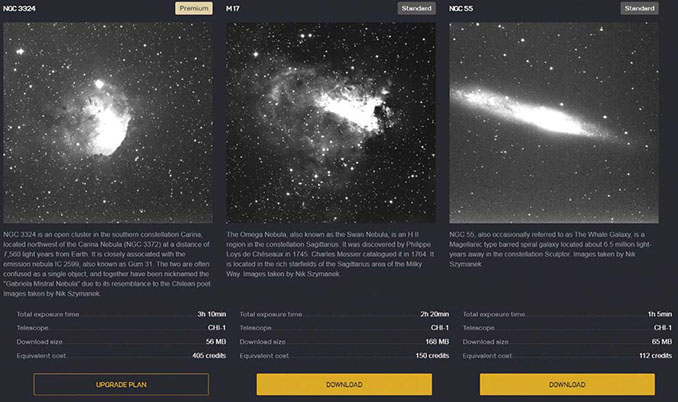
This subscription also gives you access to the tutorials, including more-specialised ‘premium’ videos. Even better, you can download pre-acquired ‘Pro Datasets’, so if you don’t want to book time on the telescopes but would like to process the data, you can navigate to the Pro Dataset page and check which objects are available and then download the individual master-frames. It’s an excellent feature that gives access to very high-quality data (Figure 8). New datasets are continually being added. The Silver Plan also assigns a personal tutor to assist with setting up observing runs and all aspects of image processing.
The Gold plan costs £49 per month and permits unlimited one-click observations, access to Premium tutorials and datasets, and a 20 per cent discount on advanced requests. The premium Pro Datasets are more sophisticated raw data involving much deeper imaging projects and also may have specific imaging tutorials associated with them.
Advanced requests
It’s very exciting to plan an observing run on these wonderful telescopes. The actual procedure by which to do this is relatively straightforward and is initiated by clicking on ‘Advanced Requests’ and then ‘New Requests’. First, we’ll need to select the type of object to be imaged, the two options being deep sky or Solar System.
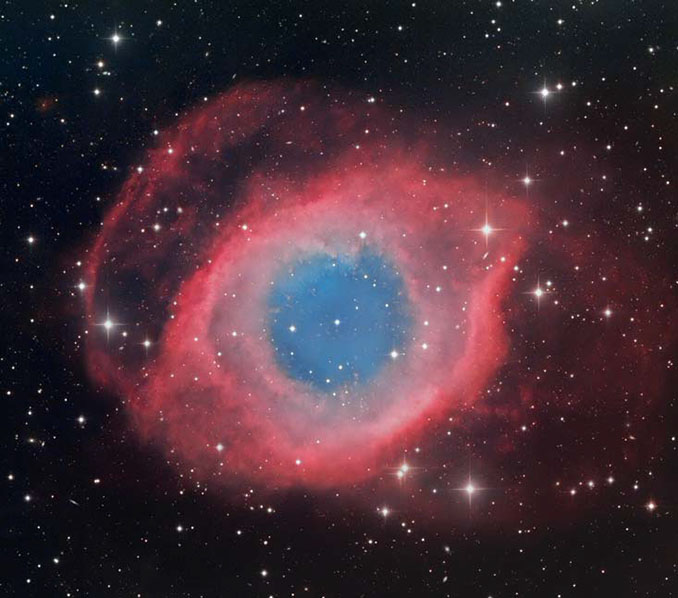
Then, under the ‘Target Name’ field, type in your object. Let’s say we’re going to image the Helix Nebula in Aquarius. Once typed in, select ‘Search Coordinates’ and the right ascension and declination values will appear. Depending on the object to be imaged, you may prefer to adjust these values slightly for better placement on the CCD sensor. I’ve done this occasionally using the photographic sky atlas Aladin for reference and to get precise positional coordinates (see this month’s Imaging Masterclass, pages 86–88, for more about Aladin). In most cases these values won’t need adjusting. Click ‘Next Step’ to go to the page where you choose which telescope to use. If the object is not visible to any telescope it won’t be shown here. I’ll choose CHI-1, the 600mm Planewave telescope.
Clicking on ‘Next Step’ again takes us to where we set up the exposure information. There are two options, ‘Astrophotography’ and ‘Advanced’. The first option displays the basic filter sets, i.e. LRGB or narrowband. The second option allows you to fine-tune your imaging by selecting specific filters, with the additional option of using Sloan R, G and I photometric filters.
Next, we’ll choose our exposure time. There are two options, ‘Same exposure time for all filters’ or ‘Different exposure time for each filter’. We’ll select the first and then type in ‘600 seconds’. The next option is where we choose the number of exposures to be taken. This will be either the same number for all filters, or you can choose a different exposure count, perhaps to increase the number of luminance frames compared to RGB frames. We’ll type in ‘4’.
Just below this section are the ‘Advanced Settings’ where you can change the binning value from 1 × 1 to 2 × 2. For our image I’ll choose 2 × 2 binning, since the pixel sampling rate for the Planewave telescope is still excellent at that value and it increases the sensitivity of the sensor.
Below that is the ‘Autofocus Interval’. At the start of an observation the telescope is critically focused. The default value for the autofocus interval is 60 minutes, so the telescope will carry out another focusing run one hour after the start of the imaging run. I find this duration works well.
One final step is to decide whether to select ‘Image Dithering’. This is a very good procedure that moves the telescope slightly between exposures to smooth out noise and artefacts during the image-processing stage, so I usually turn this on.
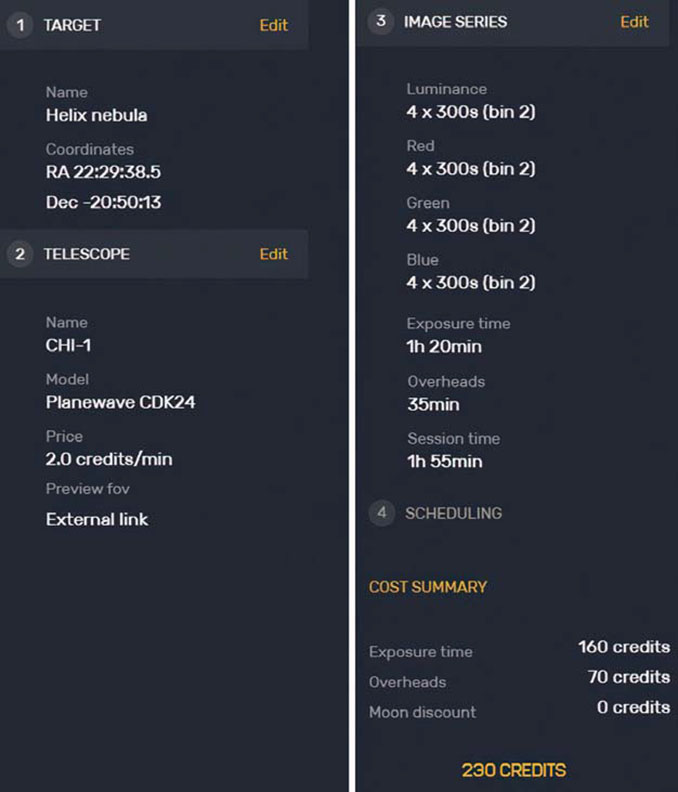
Before continuing, I should point out that the above imaging run will incur ‘overheads’ – these being the time spent during the session on autofocusing, changing filters, dithering, etc., which you are charged for. You can check the details of the observing run by looking on the right of the screen for a summary of your settings (Figure 9). If you are imaging with narrowband filters, then it’s possible to get a significant discount by imaging when the Moon is more obtrusive (since there’s less demand as deep-sky imagers prefer to avoid moonlit lights) and this is well worth doing if you are budget conscious. For example, imaging with the Moon at a 25 per cent phase offers a 10 per cent discount. A 50 per cent phase gives you a 25 per cent discount, and with a full Moon in the sky you get a whopping 75 per cent discount, so if you intend to use narrowband filters on bright targets, this is worth thinking about.
The next step is to choose whether to use automated or custom scheduling. The former is the easiest to use, pretty much automating the whole procedure. If, for any reason, the observation fails, perhaps because of poor weather, your observing slot is rescheduled. Custom scheduling allows you to pick your own imaging time. If the observation fails, then you’ll have to reschedule, but your credits are refunded. Also, the quality of the imaging frames is monitored by Telescope Live, so if any of the exposures are compromised by the weather or by rare instrumentation problems, then your credits are refunded.
The final step is to submit your request. Figure 10 shows the result of a typical observation with CHI-1 and has captured incredible detail in the Helix, as well as multiple faint background galaxies.
Telescope Live 2 is a superb resource for astrophotographers at all levels. The ‘Gallery’ section of the website showcases images taken with all the telescopes and allows communication between subscribers seeking help or advice on image processing. The ‘Blog’ section features interesting articles on hot topics in astronomy as well as Telescope Live 2 news. An ‘Academy’ section offers short and very useful explanatory articles on key astronomical concepts.
I hope this review conveys the excitement of using Telescope Live 2 for remote imaging of the deep southern sky. World-class instrumentation and prime observing locations allow you (and me!) to take our imaging to the next level and be part of an active astrophotography community producing some of the best possible images of the night sky.