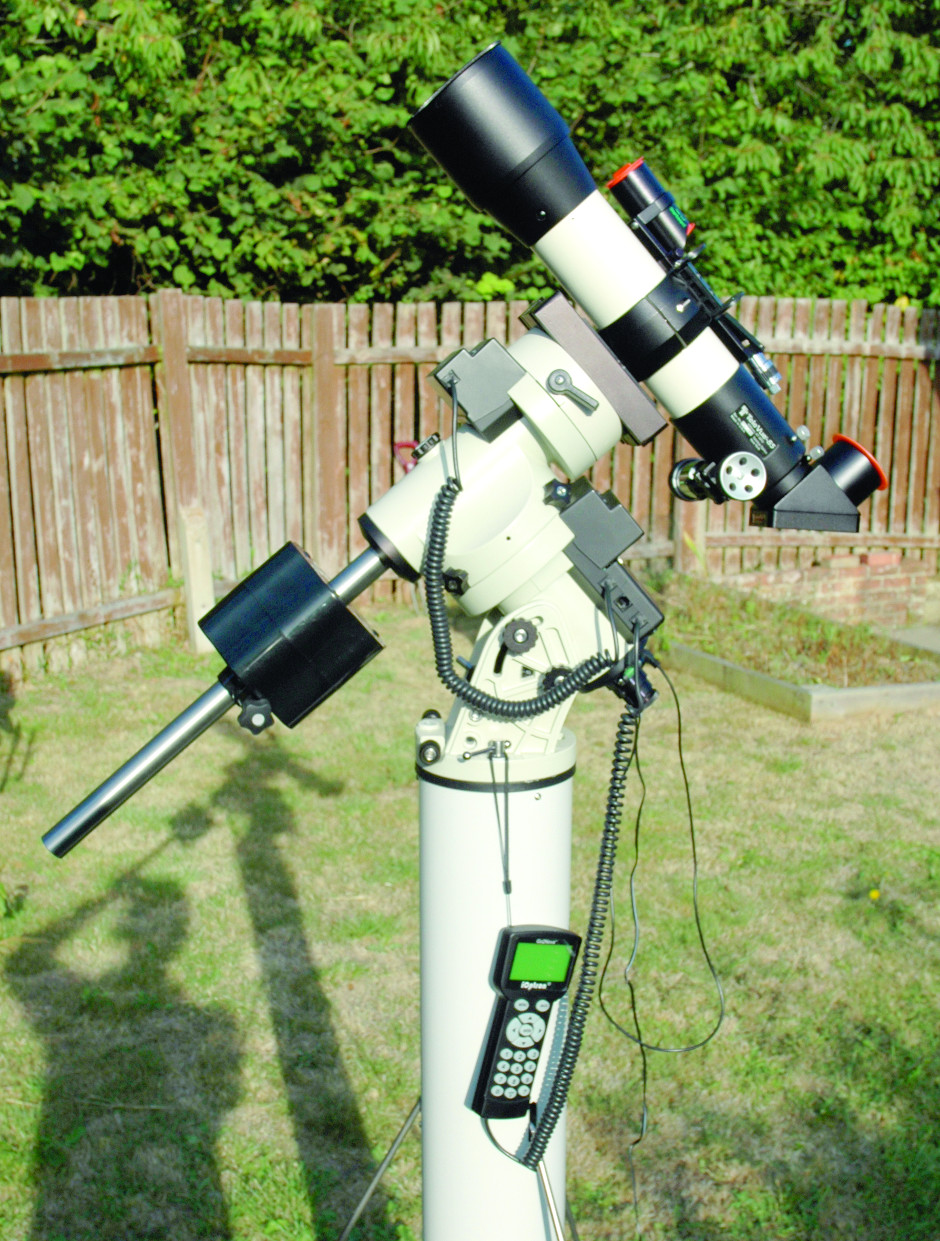
I had an issue with a missing five kilogram counterweight arm when I opened the box, but an e-mail to the distributors Altair Astro elicited a quick response and an alternative arm with an ingenious counterweight in the form of a power pack was swiftly sent to sort out the problem. This is normally an optional extra and cleverly utilises the weight of the built-in lithium batteries as the counterweight. This can be used as a replacement to the standard counterweights on the arm, or even additionally. The power pack is just one example.
I decided to try it out in its equatorial set-up first. I found installing the altitude screw adjuster a bit fiddly as this involved removing and re-installing the locking screws, but of course you only need to do this once if your primary use of the mount is for astro-imaging. As with many such systems these days, there was no instruction manual provided, so I had to download it from the iOptron website. This is a minor niggle, but could be more of an issue if the user does not have easy access to the Internet and it is sometimes just helpful to have a paper manual you can thumb through when you are with the hardware. I did like the neatness of the cabling and plugging everything in was very straightforward. Setting up the GOTO system seemed fairly straightforward too. I particularly liked just how fast the computer booted up and was ready to go in just a few seconds.

At this point I should report a problem I did discover with the saddle plate on the mount. On the face of it, the saddle is a clever innovation as it can take both standard ‘Vixen’ style dovetail plates and the wider ‘Losmandy’ type. The saddle uses two large thumb bolts to tighten the grip of the side of the saddle against the plate located on the telescope. I thought I had tightened these sufficiently, but when the telescope was slewed to a vertical position, it slipped and fell out of the saddle. Fortunately no damage was done to the telescope, as it landed on soft ground. My heart rate however, was a different matter! Evidently, greater care must be taken to ensure a really tight grip with this plate, or perhaps some further engineering to install a safety lock screw would be a good idea.

Using the SmartStar hand paddle and the GOTO system was very straightforward. The buttons did need some determined pressing to make the system respond, but in many ways this is better than having things happen because your finger twitched! Polar alignment was very quick and easy using the software assisted set-up and took only a couple of minutes. I selected the multi-star alignment for greater accuracy when using the GOTO and was pleased to find that objects selected were always with the half-degree field-of-view of my selected eyepiece.
Probably the most interesting thing about this mount is that it can be used in either equatorial or alt-azimuth configurations. Swapping between the two is a little fiddly, but I can think of no other mount on the market that has this option ‘built in’. Changing the style of the mount is not the sort of thing I would want to do on a regular basis, but it is a useful feature. Of course the most important thing was to find out just how accurate the GOTO was in the new mode.

In conclusion, there is a lot to commend about the iOptron iEQ45 mount. The things I liked about it were the innovative idea of combining an equatorial and alt-azimuth mount in the same package; the ease of set-up and thoughtful design and the ergonomic GOTO system: the idea of a power-pack acting as a counterweight was particularly clever. I also thought the software assisted balancing was a useful addition to any equatorial set up. The things I did not like were the lack of security for holding a telescope in the saddle plate (the only major concern!), the slightly fiddly change over from equatorial to alt-az and the rather noisy motors when slewing, which were minor points. Overall though, this is a mount to seriously consider if you are looking for a reasonably portable and versatile platform for small- to medium-sized telescopes and for a wide range of astro-imaging tasks.
Visit Ninian Boyle’s website Astronomy Know How at www.astronomyknowhow.com.
At a glance
Payload: 20kg (45lbs)
Mount weight: 11.4kg
Power: 12V DC
GOTO database: 130,000 objects
Modes: Alt-az for visual work and equatorial for imaging; supports ASCOM control
Dovetail: Dual Vixen/Losmandy dovetail interface
Accessories: two 5kg counterweights, stainless steel tripod, polar scope with dark-field illumination, 12V DC car plug adaptor
Price: £1,499
Details: www.altairastro.com


