At a glance
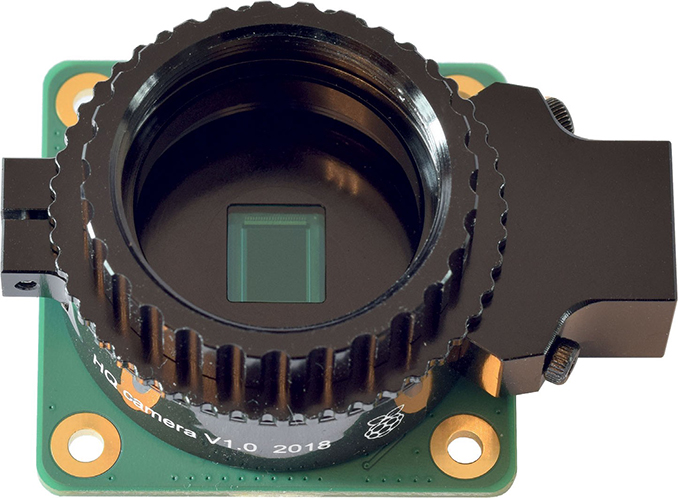
Sensor: Sony IMX477R CMOS colour
Resolution: 12.3 megapixels, 4,056 × 3,040
Pixel size: 1.55μm × 1.55μm
Sensor diagonal: 7.9mm
Board size: 38mm × 38mm
Lens compatibility: C-mount and CS-mount lenses
Ribbon cable length: 20cm, supplied with the camera
Raspberry Pi compatibility: Works with all Pi models with a camera connector (all recent models)
Price: £49.50 from usual Pi suppliers
The Raspberry Pi is the best-selling British computer of all time. It is credit-card sized, using a ‘system on a chip’ that integrates the components of a computer in a single computer chip. A series of different Pi models have been released since 2012; all are inexpensive and fun to play with. I own a Pi 3 Model B+, which offers a 1.4 GHz processor and 1GB of RAM, all for less than £40. Each Pi runs an operating system called Raspberry Pi OS (previously known as Raspbian), which is a version of Linux optimised for the Pi’s hardware. I am no expert in Linux – all you need to know is that the OS is freely downloadable and that it boots into a desktop environment similar to Windows.
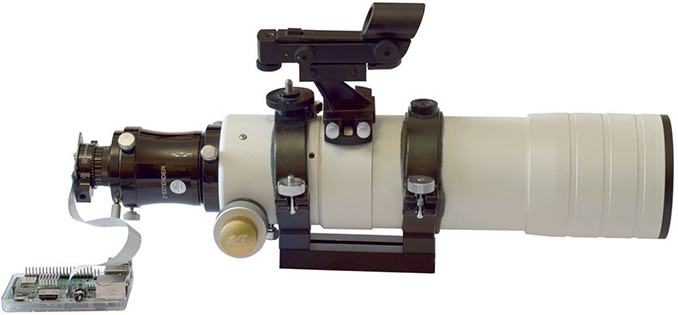
Cameras have been released for the Pi in the past: version one used a fivemegapixel sensor, with a fixed-focus lens attached. Version two used an eightmegapixel sensor, also with a fixed-focus lens. These cameras are not suitable for astrophotography, since the lens is glued to the sensor and the focus can’t be adjusted. More interesting is the version three’s ‘High Quality’ (HQ) camera, with a 12.3-megapixel Sony sensor and no lens attached – instead any C-mount or CS-mount lens can be fitted, or there are adaptors available to attach other lenses, such as a DSLR lens or even a telescope. I wondered how suitable this camera would be for astrophotography, so I ordered one as soon as they became available.
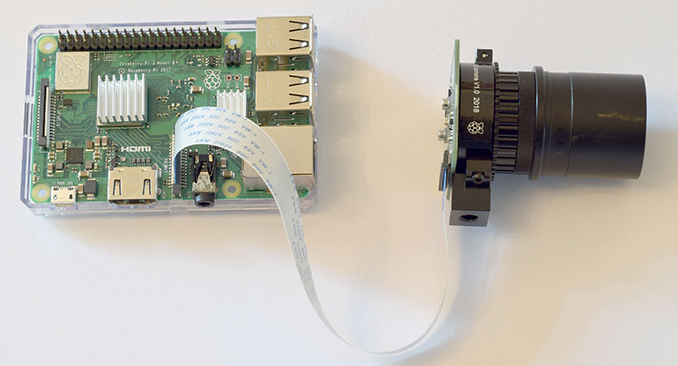
The HQ camera is small, on a board measuring 38mm square. It attaches to the Pi via a ribbon cable: a 20 centimetre length of cable is supplied with the camera, but longer cables are more convenient and can be bought for a few pounds. I attached the camera to the Pi with the supplied cable, booted everything up and enabled the camera interface in the ‘Configuration’ options. I then rebooted as instructed and the camera was good to go.
I wanted to try out the camera coupled to a William Optics Megrez 72 telescope (a 72mm doublet refractor with a focal length of 432mm). I already own a planetary camera from The Imaging Source that I knew had a C-mount and came with a 1.25-inch adaptor to go into the back of a telescope. So I screwed the adaptor onto the HQ camera and inserted it into the back of the Megrez 72.
Capturing images with ‘raspistill’
The image-capturing program within the Raspberry Pi OS is called raspistill. It is run from a command line interface, so I clicked on the ‘Terminal’ icon at the top of the screen to bring up the command line prompt. To test the camera, I typed in:
raspistill -o testpic1.jpg
This meant that I was asking the raspistill program to output an image called testpic1.jpg to my home/pi folder. Everything worked well and I could see that the image testpic1.jpg had been saved.
I waited for dusk and for the Moon to be visible high in the sky. While waiting, I took the opportunity to read up on the raspistill program and the long list of options available within the program. For example:
raspistill -t 20000 -ISO 100 -ss 10000 -o testpic2.jpg
This will give a live preview image for 20,000 milliseconds (i.e. 20 seconds) before taking an image at ISO 100, a shutter speed of 10,000 microseconds (i.e. 0.01 second) and outputting a file called testpic2.jpg. The live preview image gives the opportunity to adjust the focus on the telescope until it looks good; the ISO and the shutter speed can be adjusted by trial and error until the image is neither too dark nor too overexposed.
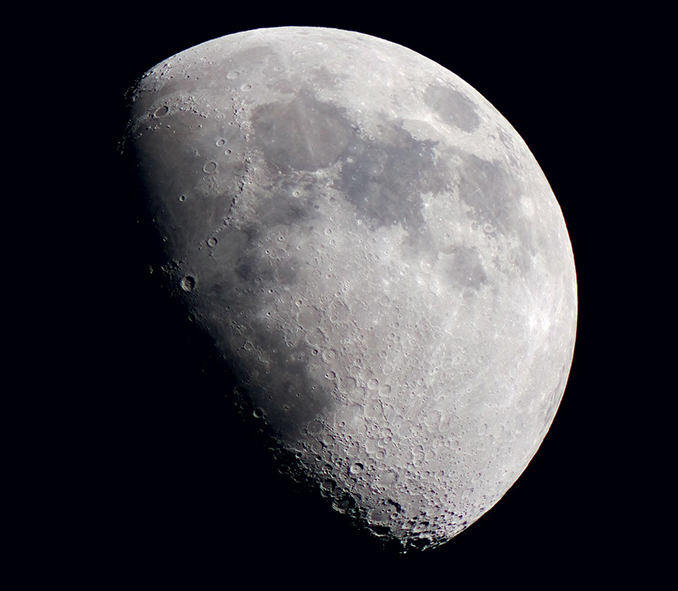
Once it was getting dark outside and I had set up the Megrez 72 on an equatorial mount, I pointed the telescope at the Moon using a red-dot finder. A command of
raspistill -t 60000
gave me a preview image for 60 seconds without any photo being taken – this was useful for initial rough focusing. I needed a two-inch extension tube and to rack out the focus nearly as far as possible before focus was achieved. Once there, I had an impressive view of a first quarter Moon.
I arbitrarily took a first photo at ISO 100 with a shutter speed of 0.01 second, and I was delighted with the image that I got. I played around with different ISO levels and different shutter speeds, but nothing was better than the very first photo I took.
Capturing video with ‘raspivid’
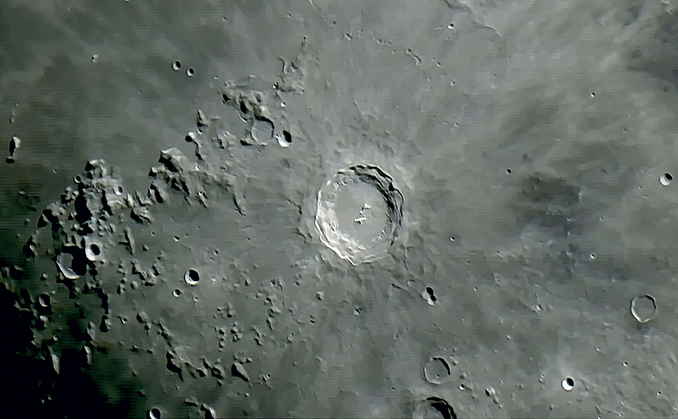
My next ambition with the HQ camera was to image a single feature on the Moon using a telescope with greater focal length. I therefore removed the Megrez 72 and replaced it with a Sky-Watcher SkyMax 180 telescope (a Maksutov- Cassegrain with a focal length of 2,700mm). From my first image of the Moon I decided to target the crater Copernicus in greater detail.
A single image at such a high focal length would give a poor result. Much better results can be achieved by capturing a video of the target and feeding this video into a stacking program, such as RegiStax or AutoStakkert (both free to download). The program cleverly chooses the best frames from the video feed and combines them to generate a good-quality single image.
The video capturing program within the Raspberry Pi OS is called raspivid. Like raspistill, it too is run from a command line and offers a long list of possible options. I opened up a Terminal and typed in:
raspivid -t 10000 -ISO 100 -o testvid1.h264
This allowed me to capture a video stream for 10 seconds (10,000 milliseconds) at ISO 100 and to save it in H264 format as a file called testvid1.h264. Again, a bit of trial and error is needed to capture a satisfactory video, but I soon had a video file of Copernicus to work with.
It’s not possible to input.h264 video files into RegiStax, so I used a free converter to convert my.h264 file into a.avi file that RegiStax accepted without complaint. The usual RegiStax processes of aligning the frames, stacking them and then using wavelets to sharpen the image went well, and gave me a very acceptable image of Copernicus and the surrounding area.
Conclusions
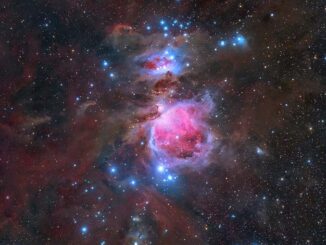
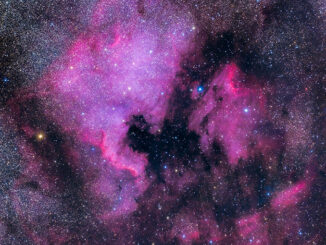
The Raspberry Pi HQ camera has a recent Sony colour sensor and a decent 12.3 megapixels, all for less than £50. In my testing using a Pi 3, raspistill and raspivid, I found that it was possible to capture pleasing images of the Moon. Other users have successfully imaged Jupiter and Saturn.
The philosophy of the Raspberry Pi is to have fun messing about with inexpensive kit. While the HQ camera is more expensive than the v1 or v2 cameras, it can be used with any telescope or DSLR lens so it justifies its price tag. I enjoyed reviewing this camera and proved that it can be used in astro-imaging scenarios. If you want a change from Windows or Mac OS, why not give it a go?