There has been a radical change in the way that astrophotographers image the night sky. Step back ten years and the majority were using monochrome CCD cameras fitted with a selection of LRGB and narrowband filters housed in an electronic or manual filter-wheel. Although producing super results, great dedication was required in terms of the time needed to secure enough data through the filters, and a willingness to invest in expensive hardware.
With the astonishing influx of high-quality cameras equipped with CMOS sensors (both colour and monochrome), a rapid transition has occurred, realistically sounding the death-knell for CCD cameras. Most amateur imagers choose to work with ‘one-shot’ colour cameras that require no filters to produce colour images, or DSLR cameras that are cheap and easy to use, with some limitations.
Another revolution has concerned the use of additional filters for these cameras. The filters are able to isolate specific emission from deep-sky objects, allowing effective narrowband imaging with colour cameras. The most popular are the Optolong L-eXtreme and L-eNhance dual/triple bandpass filters that isolate hydrogen-alpha, oxygen-III and hydrogen-beta wavelengths from emission nebulae. With the ever growing scourge of light pollution, having a filter that can block most domestic emissions, as well as moonlight, allows high-quality imaging even from towns and cities.
Additional advantages are cost savings, through using just a single filter, and time savings. If you’re imaging a bright object you can secure a pretty decent image in just one night, making this method suitable for people with limited time, especially if you are not equipped with a dedicated observatory and have to set up from scratch every clear night.

A versatile filter
A new offering is the Antlia ALP-T dual-band filter. Also designed to be used with colour cameras and DSLRs, it features a bandpass of 5nm centred on the hydrogen-alpha and oxygen-III lines. When I was asked to review this filter I hesitated, because I still use CCD cameras equipped with multiple filters and don’t own a cooled one-shot camera with which the Antlia filter would work best. Of course, this filter can be used with a monochrome CCD or CMOS camera and the 5nm bandwidth of the filter matches my own Astrodon filters, so I was intrigued. I also own an ageing Canon 5D Mark II DSLR, which is excellent for daytime and twilight photography but being unmodified is less capable for astrophotography. With the above limitation in mind I set out to put the Antlia ALP-T filter through its paces.
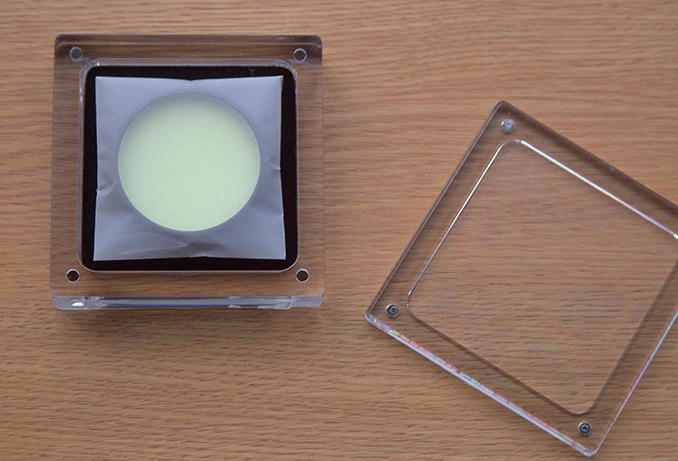
The filter arrived in a very nice, square, plastic casing that had four small magnets fitted, one in each corner that allowed the case’s lid to snap into place. This is a nice feature and the quality casing looked like it should have housed an expensive piece of jewellery rather than an astro filter. Also included is a filter scan report acquired with a high-quality spectrometer that indeed confirmed the previously mentioned bandwidths. The filter was supplied in two-inch format, so it was easy to install on my cameras using a standard two-inch nosepiece. The filter cell is threaded on both sides, allowing further accessories to be attached if required.
I decided to start off by testing the Antlia ALP-T filter with my monochrome QSI 583wsg CCD camera and Pentax 75mm (three-inch) SDHF apochromatic refractor. I attached a two-inch nosepiece to the camera and then attached the ALP-T filter to that. The CCD camera has an internal filter-wheel and off-axis autoguiding port built-in, so to use the two-inch filter I had to remove one of the 1.25-inch filters in the camera to allow an unobstructed light path to the sensor. I wasn’t sure if this would work without causing vignetting at the edges of the frame, but happily this didn’t appear to be a problem.

Fine details through the filter
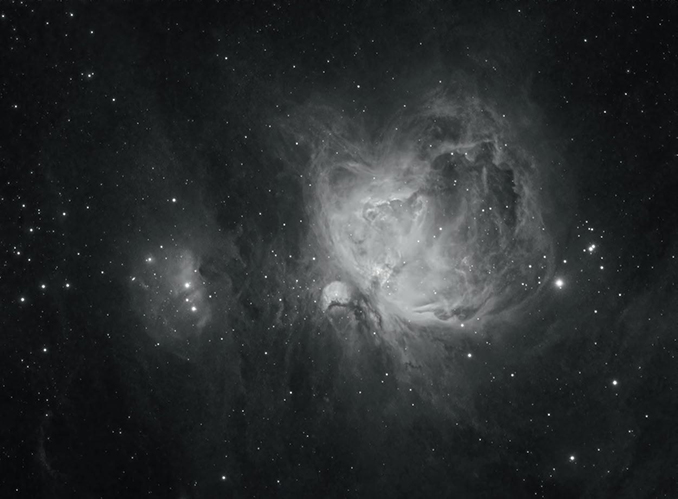
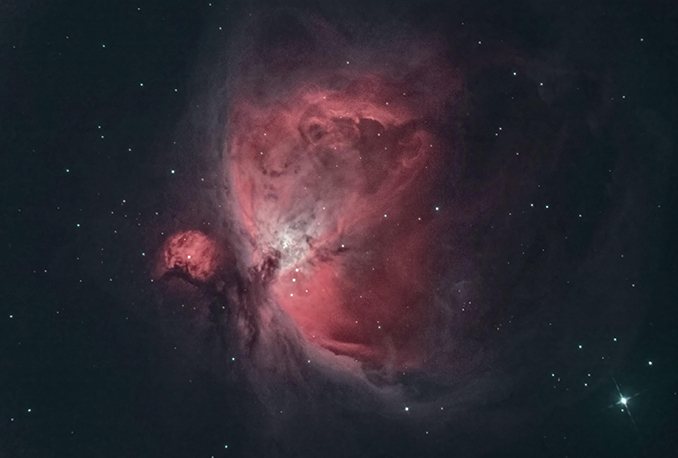
My first target was M42, the magnificent Orion Nebula, which was conveniently placed near the meridian during my testing in mid-January. The Orion Nebula is an interesting target that has to be imaged in a specific way to get the best results. The first course of action is to discover, by trial and error, what the longest exposure time is that doesn’t cause the Trapezium stars and bright nebulosity surrounding them to become overexposed with a particular imaging set-up. I found that 180-second sub-exposures worked very well, keeping the stars visible but also recording a lot of the fainter nebulosity. I shot six of these and then a further thirteen 300-second exposures. These longer exposures would certainly overexpose the core area but the plan was to record much more of the faint outer extremities of the nebula. I then processed the two datasets separately and blended them together in Affinity Photo to get the best of both worlds.
The ALP-T filter did a great job, capturing fine details throughout the nebula. The bright cluster stars at centre-right were halo-free, a sign of high-quality coatings on the filter. I was pleasantly surprised by the amount of structure recorded in NGC 1977, the famous ‘Running Man’ Nebula, shown at lower centre-left. This is a reflection nebula, best imaged using LRGB filters or colour cameras, so it was nice to see it recorded so well with a 5nm narrowband filter. The bright stars embedded in this nebula were also free of any haloes.
While the sky was still clear I removed the QSI camera and replaced it with my Canon 5D Mk II DSLR, but the whopping 242 × 162 arcminute fieldof-view reduced the Orion Nebula to minuscule proportions, so it was on to Plan B.
In combination with a focal reducer
The next clear night was cold and crisp but faintly hazy, with a bright 78 per cent waxing Moon lurking in Taurus. This would provide a good test of the filter’s ability to block moonlight. By now I had installed the Canon 5D Mk II DSLR onto my 254mm GSO Ritchey–Chrétien telescope. When imaging with this telescope and my QSI CCD cameras I usually employ an Astro Physics 0.67× focal reducer. In this configuration the focal length of the telescope is reduced from 2,000mm to 1,340mm. I opted to use this now on the Canon DSLR and to attach it I employed a standard Canon camera adaptor coupled to a two-inch nosepiece. The focal reducer screwed onto the front of that and at the end of the chain I installed the ALP-T filter. I had no idea if this mechanical configuration would work, but it turned out to be reasonably successful. I controlled the DSLR during the imaging run using the wonderful Backyard EOS Premium Edition.
Once more, it was necessary to assess the optimal exposure lengths to be able to blend multiple images. For all of the tests conducted with the Canon 5D Mk II, I chose an ISO rating of 1600. I had to reduce the exposure time to just 60-seconds to preserve the Trapezium stars. These shorter exposures seemed reminiscent of bi-colour images, which is not too surprising given that they were taken with a dual-band filter. The 60-second dataset consisted of just five sub-exposures and then I went on to capture a further fifteen 300-second exposures. As always, I was careful to take a good amount of calibration frames (dark, flat and bias) before ending the imaging session. To calibrate and stack both datasets I used Astro Pixel Processor software and it performed well.
No haloes
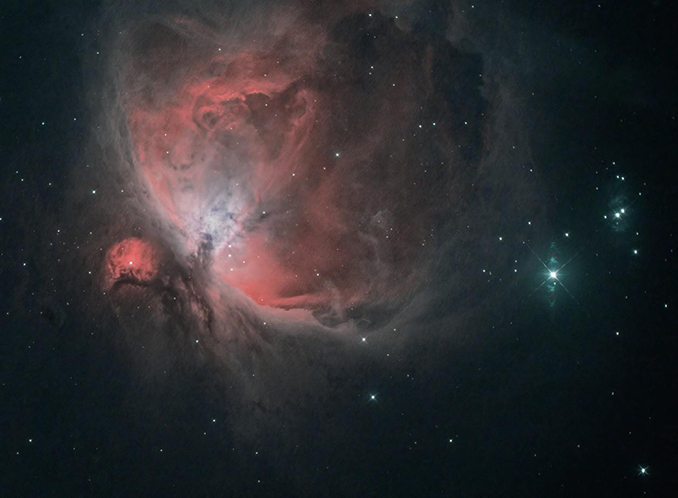
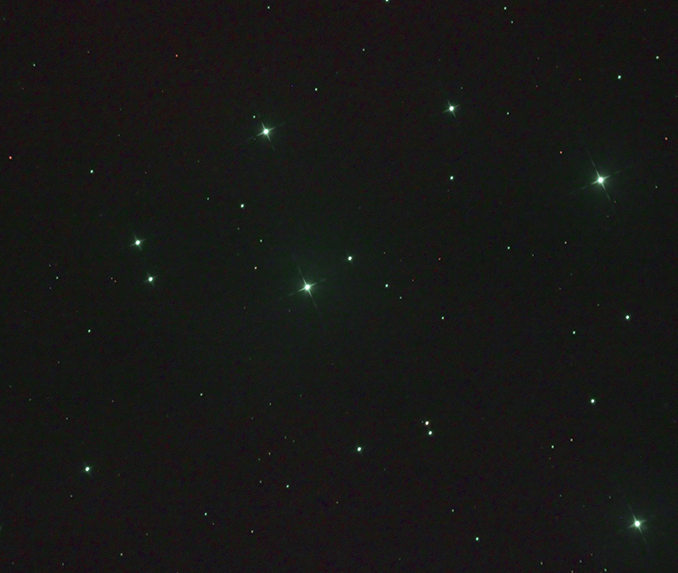
Again I called upon Affinity Photo to create a twolayer image and blended the two sets together. The image scale was really nice and, considering that the sky was a bit hazy and flooded with moonlight, the end result was pretty good. I noted some strange reflections around the brightest stars but at this point I was 99.9 per cent certain that these were caused by the spacing of the focal reducer. To test this conjecture, on the next clear night when the Moon was less troublesome, I removed the focal reducer and took some further images working at f/8. I started off by pointing the telescope towards the Pleiades and taking a single 600-second exposure. The image downloaded and a quick perusal confirmed that the star images were totally free of haloes. All of those weird reflections had indeed been caused by the focal reducer.
After this, I returned to the Orion Nebula one more time. As before, I shot a sequence of exposures of various length and blended together datasets consisting of 120 seconds and 300 seconds. So far, the filter had performed very well, but I wanted to try and image a target that would produce a less monochromatic view, and for this I chose the Rosette Nebula in Monoceros. There was a bit of a delay waiting for the next clear night without any moonlight. The Rosette is a pretty big nebula, so I reinstalled the 0.67× focal reducer and, after focusing and setting up the autoguider, I started a sequence of thirty-one 300-second exposures. To calibrate and stack the images taken with the DSLR I once again used Astro Pixel Processor. It did a great job of creating a master colour image, although at this stage it was lacking a bit in colour variation again and the sky background was tinged in a bluish–green.
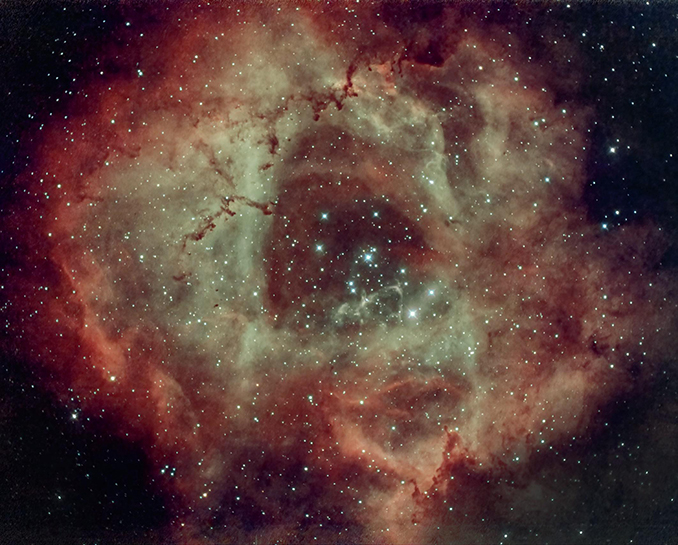
During further processing in Affinity Photo, I neutralised the background and was then able to use the ‘Colour Balance’ tool to start to tease out subtle differences within the nebula, producing a view very reminiscent of a threefilter narrowband image.
This concluded the testing phase and, despite the fickle weather and moonlight, it was an enjoyable experience. The Antlia ALP-T filter performed very well with my monochrome and colour DSLR cameras under far less than perfect skies. The filter’s ability to block harsh moonlight was admirable. Despite being a CCD ‘dinosaur’, I certainly appreciated having just a DSLR camera on the telescope without having to take hours and hours of triple-filtered exposures and everything felt much simpler. Users of modern, cooled, colour CMOS cameras will be able to get some great results with the ALP-T filter.
At a glance
Size: two-inch (M48 × 0.75 thread)
Filter thickness: 2mm
Central wavelengths: 500.7nm (O-UII) 656.3nm (H-alpha)
Bandwidth: 5nm
Peak transmission: 90% (H-alpha), 82% (O-III)
Price: £393
Available from: 365astronomy.com


