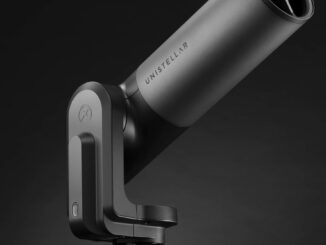
Sometimes, a great idea comes along at just the right time, when a confluence of technologies makes it possible. Conceived in January 2015 and first exhibited at the Consumer Electronics Show in Las Vegas exactly two years later, the eVscope is one such example, the brainchild of three scientists and one industrial engineer. Together, they founded Unistellar in Marseille, France, to realise their dream of a portable, self-contained and easy-to-use instrument for astronomers that they say is “100 times more powerful than a classical telescope.”
Unistellar entered into partnership with the SETI Institute in July 2017 and later that same year started a successful Kickstarter crowdfunding campaign. Evidently a lot of people are looking for a product like this, because 2,144 backers pledged $2,209,270 to turn the eVscope into reality. To date, Unistellar has delivered over 1,000 eVscopes in Europe, North America, Australia, Japan and elsewhere worldwide, with pre-orders for a further 2,000 units.
What is an eVscope?
Unistellar’s debut product is very different to a traditional optical telescope. The instrument uses an extremely sensitive electronic sensor at the focus of a 450mm focal length f/4 mirror on a self-aligning computerised alt-az mount. As it tracks its target, an onboard computer automatically applies intelligent image processing, delivering a near-real-time, full-colour image displayed on a miniature, extremely high contrast colour OLED (organic LED) screen that you view through an eyepiece on the side of the instrument, or on a separate smart device connected via Wi-Fi.
An eVscope delivers richly detailed images of nebulae and galaxies that you wouldn’t be able to see in any other way, except photographically and with far greater effort. Unistellar’s triumph lies in managing to distill a telescope on a self-aligning, computerised mount with an in-built camera and sophisticated image processing, into a portable, cable-free and easy-to-use product that runs off an internal battery for an entire night.
Since the eVscope is a wirelessly connected instrument, the Unistellar App running on your smartphone or tablet enables you to automatically locate and track any one of 5,200-plus objects (at the time of writing) in its database, or direct it towards specific coordinates in right ascension/declination, or altitude/azimuth. Thereafter, you can save and share so-called Enhanced Vision images.
Furthermore, the connected nature of the eVscope allows you to participate in ‘Citizen Science’ activities. By activating their device’s Observation Campaign Mode, users can obtain coordinates of newly discovered objects, gather data for researchers, and upload this information to Unistellar’s servers. Thus you can make a real contribution to science by observing comets, supernovae, near-Earth asteroids or occultations of stars by asteroids, which is a unique and rather exciting feature of the instrument.
First impressions
The eVscope arrives in a box whose inner lid confidently tells you to ‘Prepare To Be Amazed’. Assembly is extremely straightforward, as you merely need to open and extend the tripod legs to the required height, ensuring that its head is level according to the built-in spirit level. The integrated tube assembly and mount then slides into position and is secured by two thumbwheels.
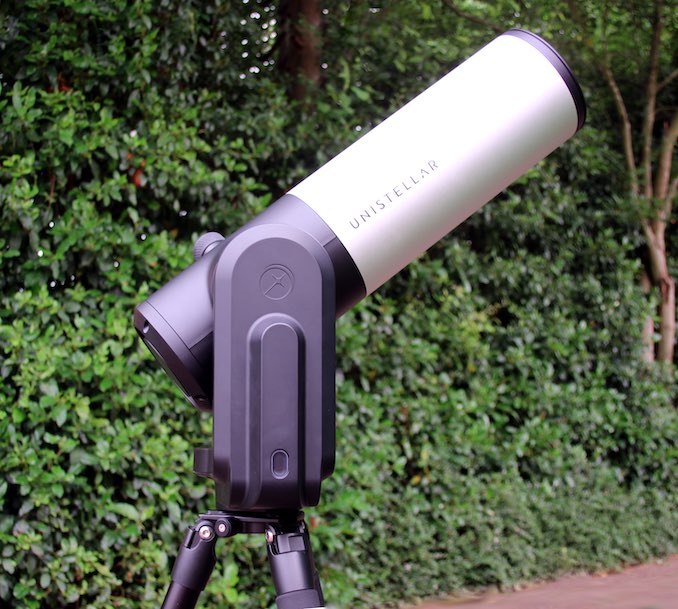
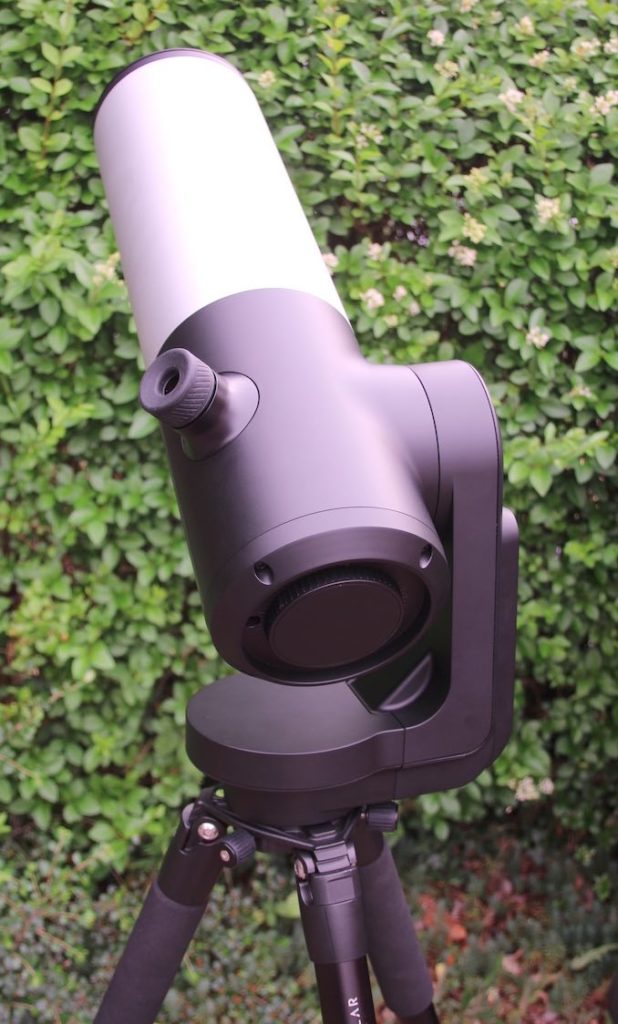
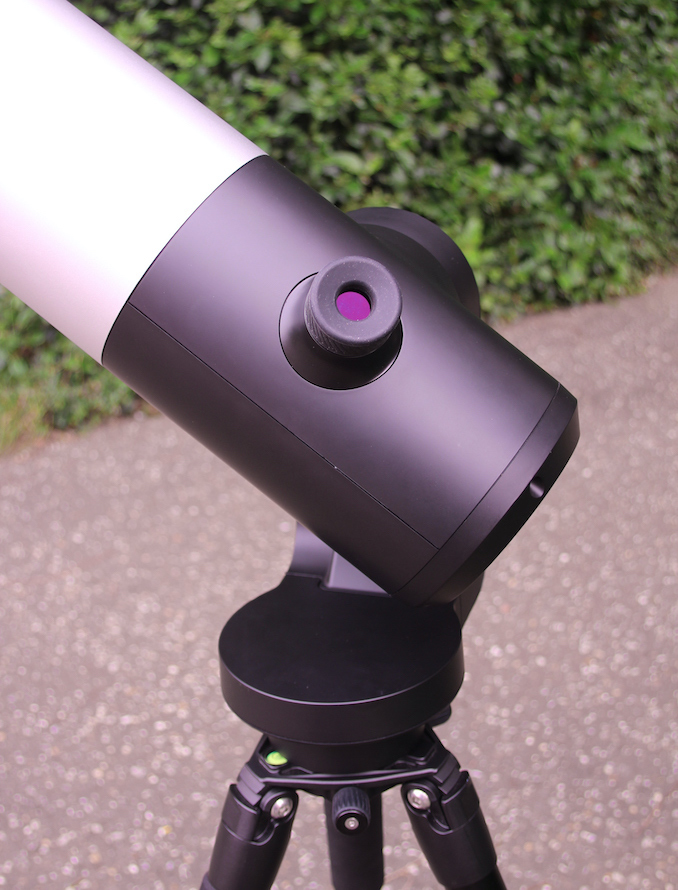
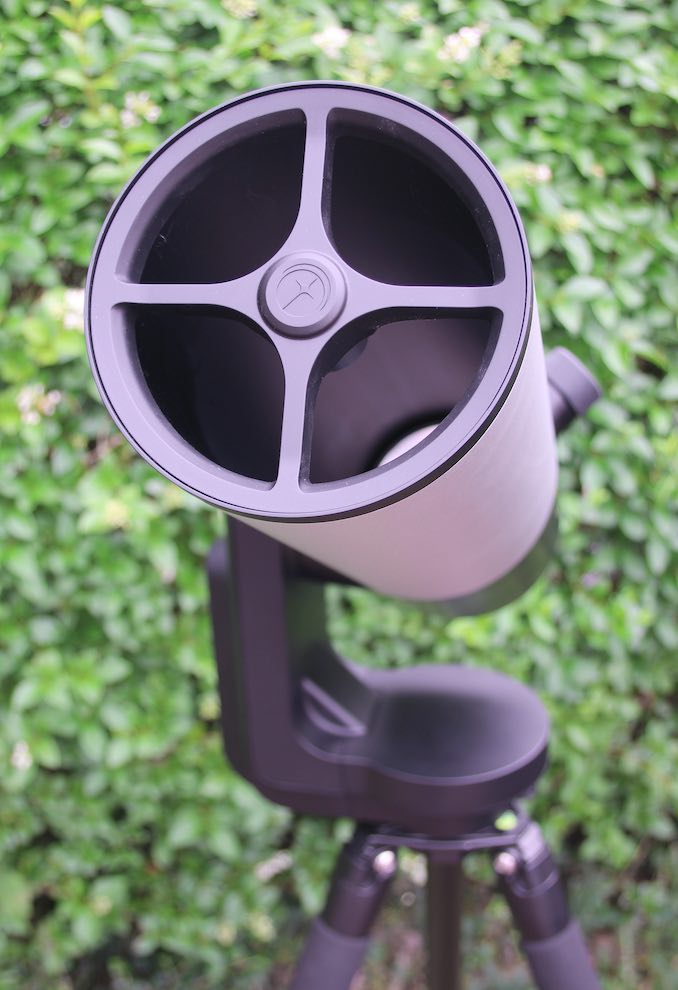
At first glance, the eVscope looks rather like a conventional reflecting telescope with a two-tone matte silver and black tube, 55 centimetres long and 14.5 centimetres in diameter, attached to an L-shaped alt-azimuth mount. The instrument’s three-section aluminium tripod has photographic-style locking levers for easy adjustment, even with gloved hands. The eyepiece port lies on the side of the tube close to the intersection of the altitude and azimuth axes – a particularly ergonomic viewing configuration since its position remains largely constant wherever the telescope is pointed in the sky. At the tripod’s lowest, midway and fully extended positions, the average eyepiece heights are 84, 117 and 153 centimetres, respectively.
Contemplating the assembled eVscope for the first time, I was immediately struck by how ‘Apple-like’ it feels. If the tech giant ever made a telescope, an iScope if you will, this is exactly how I imagine it would look. The overall impression is minimalist – there’s no computerised hand controller or keypad, just a single illuminated power button in the fork arm – yet stylishly eye-catching.
First-light tests
The eVscope’s start-up position is on the levelled tripod with the tube pointing straight up and the instrument is initialised by pressing and holding the lozenge-shaped power button for about two seconds. The button momentarily glows with a purple border that turns red after the system completes its boot sequence, which takes about seven seconds. You can download iOS 11+ and Android 5+ versions of the Unistellar App, which at the time of writing were v1.0.6 and v1.0.7, respectively. The eVscope generates its own password-free Wi-Fi hotspot that you connect your smartphone or tablet to. Currently, the device supports only direct Access Point Wi-Fi connection. In time, I hope to see an option for Station Mode connections to one’s home network for extended connectivity and remote Internet control.
The first person to connect wirelessly to the eVscope via the app is deemed the ‘Operator’, but up to nine other Unistellar App users can connect to the instrument as ‘Watchers’. If an Operator relinquishes control of the instrument by pressing the ‘release’ button, any connected watcher can then ‘request’ to be an Operator. What’s particularly neat is that while someone is looking through the eyepiece, all ten connected devices can also see the eVscope’s output on their screens. The system’s potential for outreach work, teaching and public demonstrations is obvious. The Wi-Fi range is good enough to operate an eVscope in the garden from indoors, which is good news for those who don’t like the cold!
Autonomous Field Detection
The eVscope has a built-in compass and a three-axis accelerometer, which combined with the GPS data from your phone enables the instrument to initially align itself, but not to the level of precision required for operation. For that, the eVscope uses a patent-pending system that Unistellar calls Autonomous Field Detection (AFD), better known to you and I as plate-solving. Basically, the eVscope’s onboard computer pattern-matches the stars visible in the field of view of its imaging sensor against an internal database of 20 million stellar objects, enabling the instrument to always know precisely where it’s pointed.
AFD is fast and fully automated, so you can go from powering up your eVscope to aligning it in about a minute. Unistellar’s system is a vast improvement on the alignment procedures of conventional GoTo mounts, which usually require you to obtain at least two ‘fixes’ on widely separated named stars or plate-solved positions. The eVscope is therefore ideal for quick observing sessions when you might take advantage of gaps between clouds, or maybe if you have a heavily obscured sky thanks to trees or houses.
By using a virtual on-screen joystick, you can slew the mount to a direction of interest at variable speeds up to about four degrees per second (incidentally, the internal spur gears driven by DC motors are quiet enough not to disturb the neighbours at night). Once you can see some stars on the app’s screen, press the Autonomous Field Detection icon. Within a few seconds a ‘Star Tracking: On’ message appears, and you’re done. At the end of a viewing session, you command the eVscope to ‘Park’ and it automatically powers off.
With the eVscope aligned, you can select the app’s ‘Explore’ tab and search for a target by name, consult a recommended or full list of objects, see what’s in the constellation you’re currently pointing to, search by category, or GoTo manually entered coordinates. Since it’s a connected system and the Unistellar App is under rapid development, the eVscope’s capabilities are continually growing. Unistellar is receptive to feature requests in their online Help Centre (help.unistellar.com), so by all means offer suggestions.
Focusing and collimating the eVscope
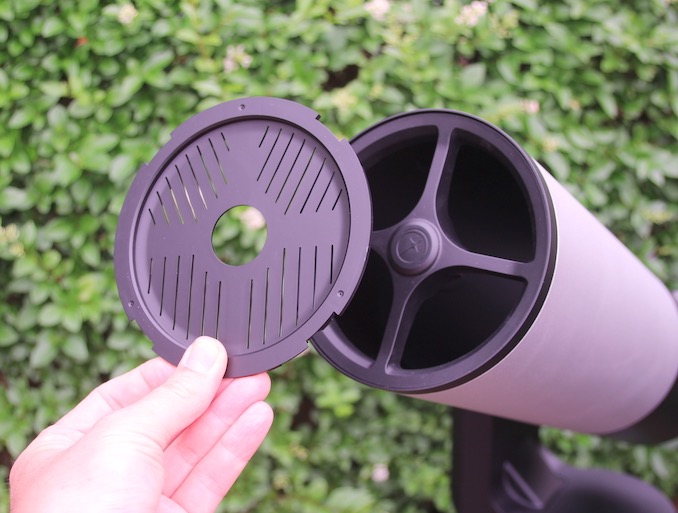
Rather cleverly, the eVscope’s dust cap incorporates a removable Bahtinov mask, which any astrophotographer knows is an indispensable aid to precise focus. With it installed over the mouth of the tube, select and GoTo any bright star in the app’s Explore tab. The mask modifies the star’s diffraction pattern into a cross shape with a central spike, so one merely turns the focusing wheel on the base of the eVscope until the spike meets the intersection of the cross and you’re done. I found that the instrument held focus very well between sessions, even when regularly transported. Collimation is also adjusted from the rear of the eVscope, if necessary. The review instrument never needed such alignment, which should allay potential purchasers’ fears that the eVscope might be somewhat ‘delicate’.
Live-Viewing the Moon and planets
As soon as your smartphone or tablet is connected to the eVscope and you launch the Unistellar App, you are in Live View mode by default. The app can automatically take control of the gain (think ISO setting on a camera) and exposure time (up to four seconds), or you can manually adjust the two sliders on screen. Observing the Moon or a bright planet like Jupiter requires deft manual adjustment of gain and exposure. You can use two-finger pinch and spread gestures on your phone to digitally zoom into the image by up to 8× and the same factor is applied to the eyepiece. However, the image zooms from the centre only – you can’t currently pan around a zoomed-in image. [October 2020 update: v1.1.1 of the iOS/Android app now permits you to pan around a zoomed-in image.]
Once you have set optimal gain and exposure set for the Moon and planets, the views will undoubtedly impress novice stargazers, but the eVscope’s resolution of 1.7 arcseconds corresponds to the visual impression of a 70mm aperture conventional telescope.
Observing Jupiter and Saturn in the small hours of late June 2020, I was able to view the two main Jovian equatorial cloud belts and its four Galilean moons, plus Saturn’s ring system, but the detail was no better than one could see in a small, quality refractor at 100×. Furthermore, since the only means of currently aligning the eVscope is on the stars, viewing the crescent Moon or a planet in twilight entails sighting along the tube and manually tracking it with the in-app joystick. Unistellar should implement a Solar System alignment option to address this, but lunar and planetary observing isn’t the eVscope’s strong suit.
Enhanced Vision
At the time of the review, the summer solstice was fast approaching when astronomical twilight lasts all night at my latitude. As a real-world test, I chose to observe from an extensive nearby park in the suburbs of a mid-sized market town that was locally dark, but heavily polluted by LED street lighting just two kilometres away to the east. One of my annual deep-sky challenges is to observe the Lagoon Nebula (Messier 8) at opposition close to 1am BST on or around 21 June when the Sun is just 14 degrees below my northern horizon.
I was keen to see just how well the eVscope performed on the showcase deep-sky objects of summer in astronomical twilight. Given that Messier 8 transits just 13 degrees high in the south at my latitude, I estimated about 1.5 magnitudes of dimming as a result of the dustier, denser atmosphere nearer the horizon, making it quite a harsh test. Having commanded the eVscope to locate and track M8, Live-View easily revealed the open cluster NGC 6530 on the eastern edge of the Lagoon, but no nebulosity.
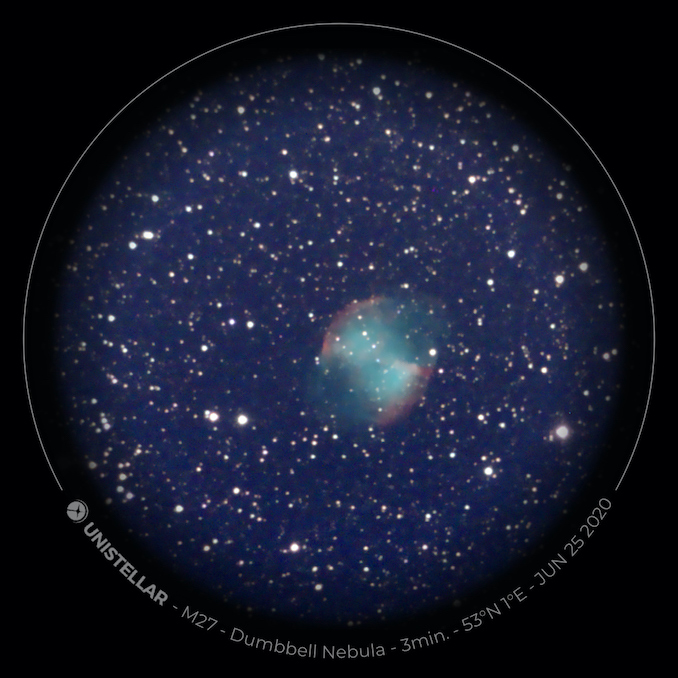
A touch of the appropriate button engages Enhanced Vision, which is where the eVscope really shows its potential; I challenge both novice and experienced observers alike not to be impressed by the results after a few tens of seconds. In Enhanced Vision mode, the output of the instrument’s sensor is continually superimposed (or stacked, in astro-imaging parlance) so that the detail, colour and clarity of the digital image grows as you watch. Given that the eVscope has an alt-azimuth mount, its onboard computer not only has to align and stack each successive image, but it flawlessly removes the effects of image rotation too – unless one chooses a field too close to the zenith, in which case you receive a warning.
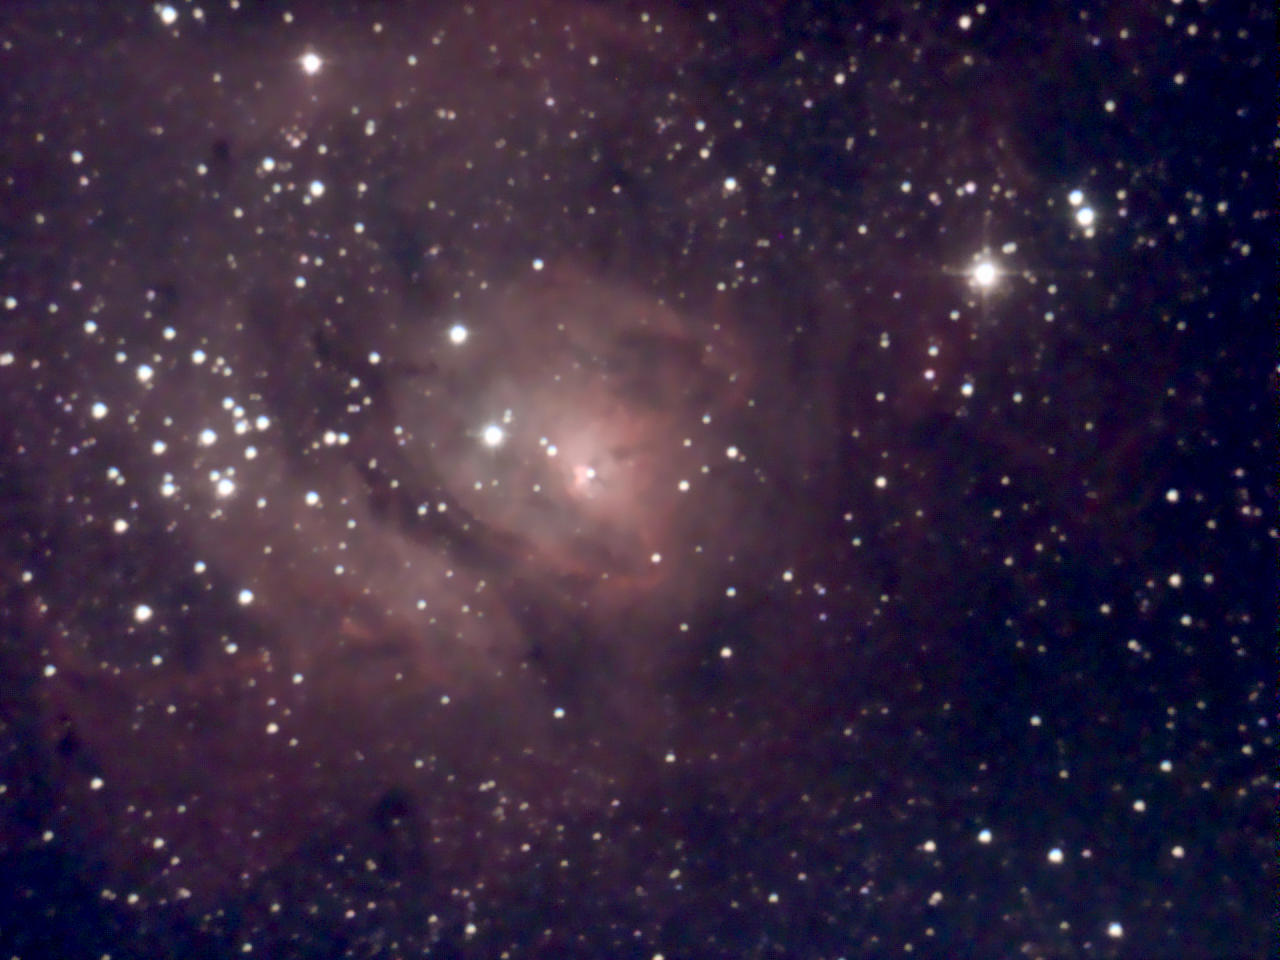
Bright nebulae require just a minute’s Enhanced Vision, but the longer you leave it, the better the results will generally be. My view of the Lagoon Nebula in Sagittarius was transformed in just 30 seconds, and by two to three minutes there were wonders to behold. The gently curved dark lane of dust clearly separated the two brighter lobes of emission nebulae, all exhibiting a great deal of colour, structure and texture. Even the tiny 30-arcsecond-wide Hourglass Nebula was evident, next to the supergiant star Herschel 36. The nearby Trifid Nebula (M20) was not quite so spectacular (I reasoned that the attenuation of shorter wavelengths at such a low altitude faded the blue reflection nebula component), but both the Omega (M17) and Eagle (M16) nebulae yielded surprising levels of fine detail, the latter clearly displaying the famed ‘Pillars of Creation’.
Getting technical
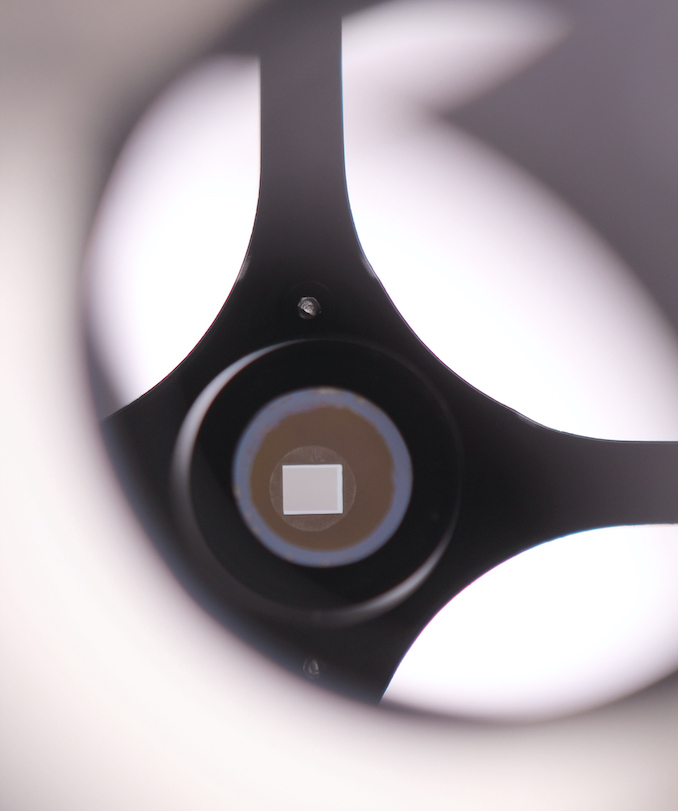
The eVscope’s imaging prowess partly stems from the 1.27-megapixel colour Sony IMX224LQR CMOS sensor that lies at the focus of its 450mm focal length, f/4 primary mirror. The IMX224 is renowned for its high sensitivity and low levels of electronic noise, possessing a matrix of 1304 × 976 pixels, each 3.75 microns (0.00375mm) in size. In tests conducted with saved images, the eVscope uses a slightly masked region of the sensor matrix, 1280 × 960 pixels or 4.8 × 3.6mm in size. Plate-solving images revealed a true field of 0.6 × 0.45 degrees, and a resolution of 1.7 arcseconds per pixel. Hence the actual focal length of the review instrument was 453mm and the measured true aperture was 110.5mm.
Concluding thoughts
So, is the eVscope ‘100 times more powerful than a classical telescope’? During my suburban tests I could routinely detect magnitude +16.5 stars on moonless nights using the eVscope’s Enhanced Vision feature. With a conventional 110mm aperture reflecting telescope I might expect to glimpse magnitude +11.5 stars, so a performance difference of five magnitudes does indeed correspond to a 100-fold difference in brightness.
It’s evident from online chatter in the telescope and imaging forums that the eVscope has polarised opinion. Its detractors sneer that it’s possible to obtain the functionality of the instrument at a fraction of the cost using off-the-shelf components (if you are very proficient with computers and don’t mind a rat’s nest of wires), while its defenders sing the praises of its compact, cable-free, easy to use and powerful on-the-fly imaging capabilities.
While there’s no denying that for the £2,599 asking price of an eVscope one can buy a large and capable conventional optical telescope, I doubt that the latter would be used half as much or would provide a fraction of the pleasure of an eVscope in the hands of a typical keen stargazer – unless they were exclusively interested in the Moon and planets, in which case they should look for another solution. The old adage that the best telescope is the one that you use most often is true, irrespective of price: I suspect that for thousands of observers worldwide the super-portable and ever-ready eVscope easily meets that criterion.
Ade Ashford has travelled the globe writing about astronomy and telescopes, serving on the staff of astronomy magazines on both sides of the Atlantic. His first Astronomy Now review appeared a quarter of a century ago.


